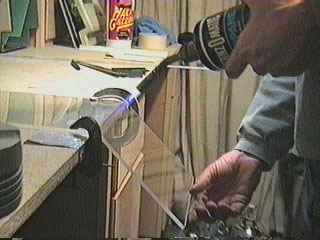
Bend the AcrylicThe bends that form the tank are created by heating the acrylic with a propane torch. Use a medium flame and move the flame back and forth across the acrylic at a moderate pace. The goal is to soften the acrylic without actualy melting the material. If you see a lick of flame from the acrylic after you move the torch away, you're getting too hot. If the acrylic gets too hot, it will bubble. This doesn't ruin the piece, but is unsightly. Be sure to blow or wipe bits of plastic and dust from the area to be heated. After the acrylic is soft enough to bend, you'll have a couple minutes to adjust the angle. This is more than enough time so be careful removing the clamps and positioning the piece. Don't try adjust the angle after it begins to cool - you'll crack the acrylic. After the piece is completely cooled, there will be enough flex in the bends to allow minor last minute adjustments to the tank. |
|
| Remove the protective film from both sides of the acrylic. You'll have to be much more careful to avoid scratching from now on. | |
| Use a square to draw a straight line across the acrylic about 192 mm from one end. This will be the face of the tank. A red or black felt-tip "Flair" marker works. | |
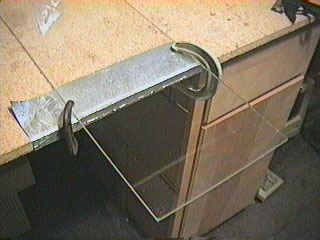
| Clamp the acrylic over a piece of aluminum foil folded over
the edge of the bench.
|
|
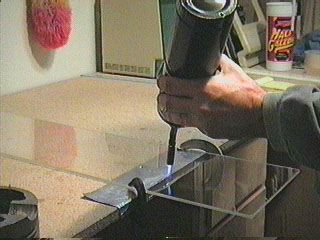
| Move the torch back and forth across the acrylic above the
bend. Try to heat the line evenly.
|
|
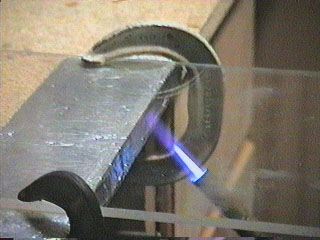
| Alternate heating the top and bottom sides of the acrylic.
|
|
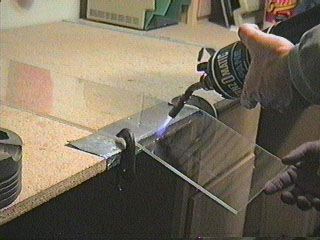
| When the acrylic starts to sag, support it with your hand
until it's soft enough to make the entire bend.
|
|
|
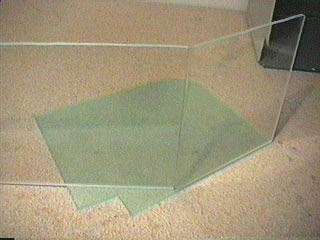
Now, allow the acrylic to drop. Make sure the bend is
the same on both ends.
 |
|
|
Remove the clamps and stand the sheet on its side on
one of the end pieces. Adjust the bend angle.
 |
|
|
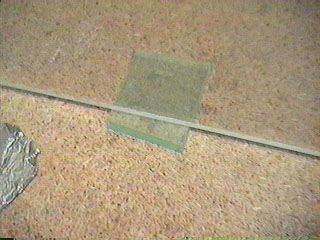
Place a piece of scrap acrylic under the far end of
the unbent portion of the sheet.
 |