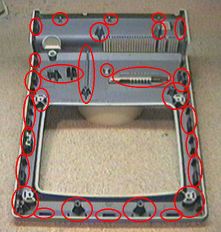
Preparing the BezelPrep Work Cover the Apple logo on the front of the bezel with masking tape (keeps it from getting scratched up). The Mac Plus, SE & Classic logo is recessed far enough to prevent scratching but you should cover the printed name with tape to prevent it from scratching. |
|
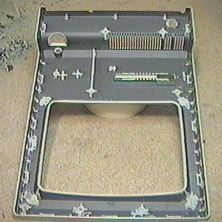
| Almost everything that sticks up, out or down
must be cut off and ground smooth.
|
|
|
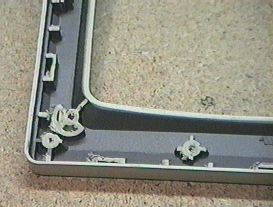
The curve of the inside of the bezel opening will have to be minimized later as part of the final fitting to the bezel to the case/tank combo. Leave it alone for now. |
|
| Leave the socket for the brightness knob alone
(we'll put the knob back in later).
|
|
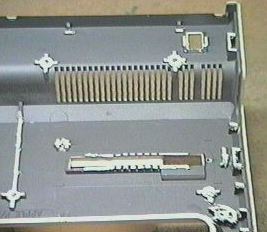
| Use a cut-off wheel on the Dremel to remove the
interior structures.
|
|
| Go slow! Take it off a little bit at a time until
you get the hang of the tool.
|
|
| I cut the bezel structures in two passes. The first time around,
I use a cut-off wheel to remove as much as possible without cutting into
the bezel frame.
|
|
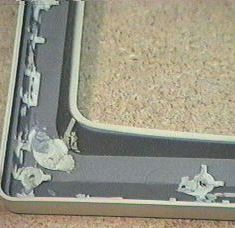
| This is another illustration of the bezel after the first
pass with the Dremel (using the cut-off wheel).
|
|
| Now, I go around again with a (small) barrel stone and grind
the structures all the way down.
|
|
| This is the bezel after all the bits have been removed.
|